
The Best Car Tar Remover: Get Rid of All Bugs and Tar Easily!
- WebMaster

- Sep 9, 2023
- 7 min read
Updated: Apr 21
Is your car constantly plagued with stubborn tar and bug residues? Don’t fret, we’ve got you covered! In this comprehensive guide, we will teach you how to choose the best car tar remover, share expert application tips, explore DIY solutions, and discuss preventive measures to keep your car looking pristine. Say goodbye to those pesky residues and hello to a spotless ride!
Key Takeaways
Choose the right tar remover for your car by considering factors such as effectiveness, residue-free formula, compatibility with paint and eco-friendliness.
Prepare surface properly prior to application and use in accordance with product instructions for optimal results.
Regular car washes, protective coatings & safe driving habits can help minimize tar & bug buildup on a vehicle.
Choosing the Right Tar Remover for Your Car

The first step in conquering tar and bug stains is selecting the right remover that suits your car’s needs. With a myriad of products available, including the popular Turtle Wax Bug and Tar Remover, it’s crucial to understand the factors to consider and the types of tar removers in the market.
When selecting a tar remover, consider the type of car you have and the type of tar you have.
Factors to Consider
Several factors weigh in when selecting the ideal bug and tar remover for your vehicle. An effective product that safely removes stubborn stains without damaging your car’s paint and is user-friendly is what you should aim for.
Moreover, when choosing a car cleaning product, consider the following factors:
Opt for a residue-free formula
Check compatibility with your car’s paint
Look for eco-friendly options
Consider cost-effectiveness
By considering these factors, you can achieve the best results without compromising your vehicle’s appearance or your wallet.
Types of Tar Removers
Tar removers come in various forms, such as sprays, foams, and concentrates, each designed to cater to specific applications. Spray tar removers, like pre-wash concentrates, are perfect for removing squashed bugs from windshields, grilles, hoods, bumpers, and headlights without harming your car’s paint. For optimal results, use a microfiber cloth and apply the product with a spray bottle.
Foam tar removers offer a convenient solution by effectively removing bug and tar splatter from affected areas without the need for additional soap and water. On the other hand, concentrate tar removers require the addition of water to activate their bug-neutralizing capabilities. Apply the concentrate to the affected area for maximum effectiveness.
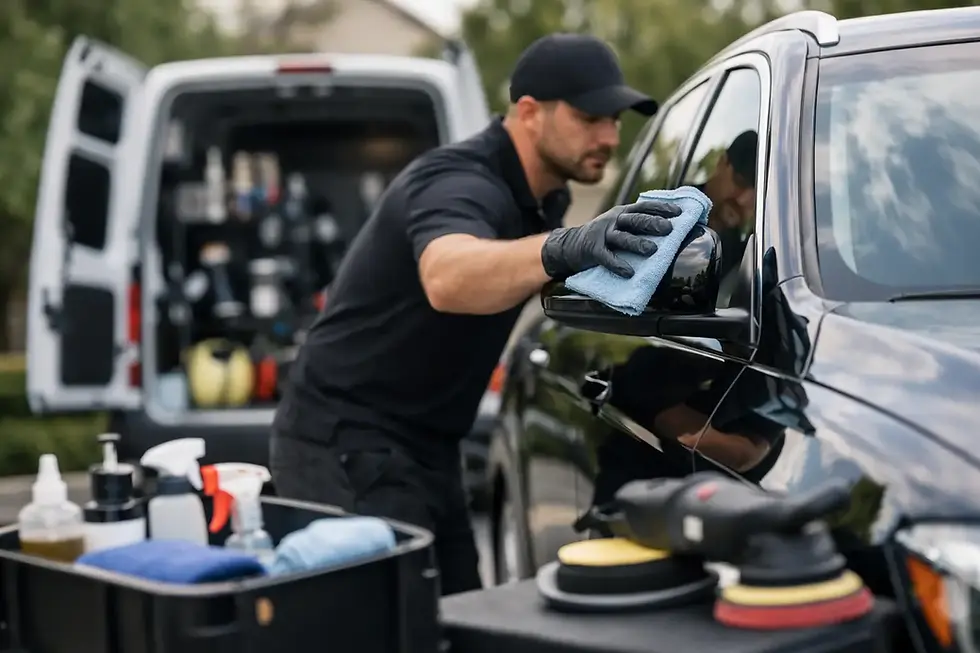
Application Tips for Car Tar Removers

Now that you’ve chosen the perfect tar remover, it’s time to learn some expert application tips. We will discuss how to prepare the surface, use tar removers correctly, and take care of your car post-application for optimal results and a spotless car.
Preparing the surface is the first step. Make sure to remove any dirt, dust, or dirt.
Preparing the Surface
Ensure you work on a cool, shady surface and pre-wash your car before applying the chosen tar remover. Here are the steps to follow.
Start by removing any loose dirt, debris, or contaminants using a mild soap and water solution or car wash shampoo.
Rinse thoroughly and allow the surface to dry completely.
Don’t forget to protect adjacent areas from potential contact with the tar remover by using masking tape or plastic sheeting.
Before applying the tar remover to the entire surface, test it in a small, inconspicuous area to confirm compatibility and evaluate any possible adverse reactions. Follow the product’s instructions and apply the tar remover to a clean cloth or sponge, gently scrubbing it onto the tar spots. Allow the remover to penetrate the tar for a few minutes before wiping away the residue.
Proper Usage of Tar Removers

Applying tar removers using the correct techniques is key to achieving optimal results. Begin by adhering to the product’s instructions, particularly the recommended dwell time, which allows the remover to penetrate and break down the tar. Agitate the surface gently to loosen the tar and bugs without damaging your car’s paint.
Rinse the treated area thoroughly with water to remove any residue and prevent potential harm to your car’s surfaces. Finally, dry the surface using a clean, dry cloth to avoid water spots or streaks.
Post-Application Care
Keeping your car clean and protected after using a tar remover is crucial. Here are the steps to follow.
Upon removing the tar and bugs, rinse the surface properly.
Dry the surface thoroughly.
Apply a wax or sealant to the treated area to protect and restore your car’s shine, ensuring it remains free from tar and other debris.
Regularly wash and wax your vehicle to maintain its appearance and cleanliness.
DIY Solutions for Tar and Bug Removal

If you’re looking for alternative methods to remove bugs, such as bug tar and other bugs, there are DIY solutions using household items that can be just as effective as a commercial bug tar remover.
We’ll evaluate the pros and cons of these DIY methods to help you determine their suitability for your needs.
Household Items
Common household items can be surprisingly effective in removing tar and bugs from your car. For instance, you can use:
Baking soda
Vinegar
WD-40
Cooking oil
Peanut butter
These items are known to dissolve tar and bug residues and can be used to loosen them from car surfaces with a little elbow grease.
To use these household items, simply follow these steps:
Apply them to the affected areas.
Let them sit for a few minutes to break down the tar and bugs.
Gently scrub or wipe away the residue.
Rinse the area with water.
Pat dry to prevent any water spots or streaks.
Pros and Cons of DIY Solutions
DIY solutions for tar and bug removal offer a unique set of pros and cons.
Cost-effectiveness: DIY solutions often require fewer materials and tools compared to professional services, making them more affordable.
Convenience: DIY solutions can be carried out at any time and place, providing flexibility and convenience.
Control: DIY solutions allow you to have more control over the process, allowing you to tailor the solution to your specific requirements.
However, there are drawbacks to using DIY solutions. They can be time-demanding, requiring more effort and concentration than professional services. More importantly, improper application can lead to damage to your car’s surfaces, and DIY solutions may not be as effective in removing all tar and bugs compared to specialized products.
Preventive Measures to Minimize Tar and Bug Buildup

Adopting preventive measures can significantly reduce the buildup of tar and bugs on your car, ultimately preserving its appearance, cleanliness, and car’s paint.
We will highlight the role of regular car washes, protective coatings, and safe driving habits in maintaining a car’s cleanliness and appearance, as well as preserving its car paint.
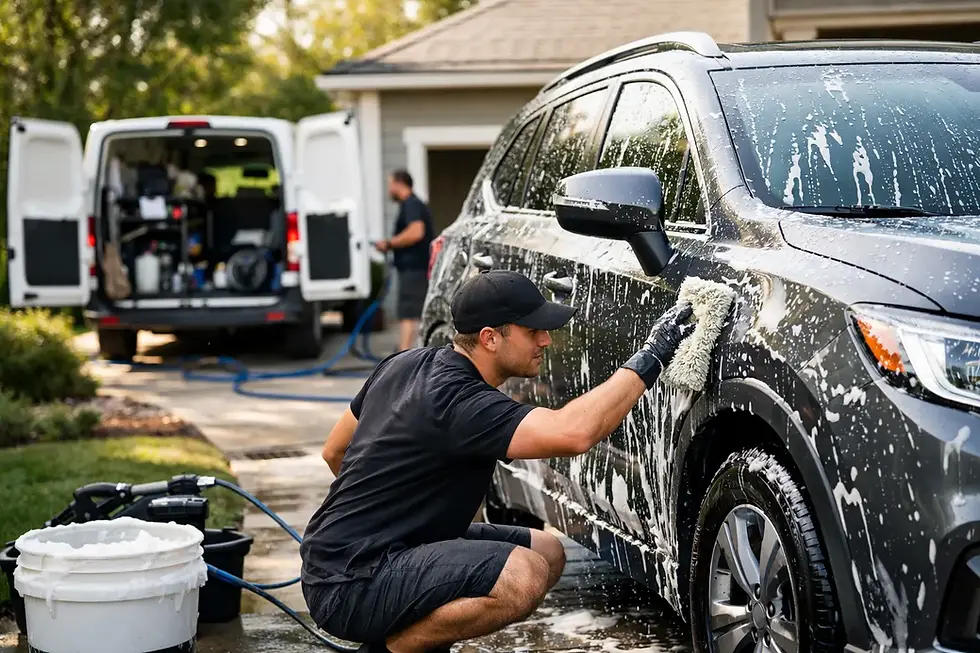
Regular Car Washes
Regular car washes are key in warding off tar and bug accumulation while keeping your car looking its best. It is recommended to wash your car at least once a month or more often if you live in an area with a significant amount of dust or dirt.
For a successful car wash, follow these steps:
Use a mild soap and a soft cloth or sponge.
Rinse your car with water.
Prepare a bucket of soapy water and apply it with the cloth to gently scrub the car.
Rinse again.
Dry your car with a clean, soft cloth to prevent water spots or streaks.
Protective Coatings
Use of protective coatings such as wax, paint sealants, or ceramic coatings can lessen the attachment of tar and bugs to your car’s exterior. These coatings not only make it easier to remove tar and bugs, but also protect your car from potential damage and staining.
To apply a protective clear coat, follow these steps:
Ensure your car’s surface is clean and free of any dirt or debris.
Follow the manufacturer’s instructions for proper application.
Allow the coating to cure before exposing it to the elements.
Regularly reapply the coating to maintain its effectiveness.
Safe Driving Practices
Adopting safe driving practices can help reduce the accumulation of tar and bugs on your car. For example, avoid high-speed driving during bug season, which can cause more bugs to impact your vehicle. Additionally, consider using a car bra or protective film on the front of your car to shield it against bugs and tar.
Prevent parking under trees where bugs and sap may fall onto your car. Instead, park in open areas or use a car cover to protect your vehicle. By following these preventive measures, you can minimize tar and bug buildup and maintain the pristine appearance of your car.
Summary
In conclusion, keeping your car free from tar and bug residue is achievable with the right knowledge and tools. By choosing the appropriate tar remover, applying it correctly, considering DIY solutions, and adopting preventive measures, you can maintain your car’s appearance and cleanliness. Now, armed with this comprehensive guide, you’re ready to tackle those pesky tar and bug stains and keep your car looking as good as new!
Frequently Asked Questions
What is the best car tar remover?
For the best tar remover for cars, our top recommendation is Nexgen Bug and Tar Remover, followed by Turtle Wax Bug and Tar Remover, 3D Bug Remover, Chemical Guys Bug & Tar Heavy Duty Car Wash, Adam’s Bug Remover, CarPro Tarx Tar & Adhesive Remover, and GYEON Quartz Q2M Tar Remover.
How do you get dried tar off a car?
To remove tar from your vehicle, spray a clean microfiber cloth with either WD-40 or Goo Gone and rub it into the tar.
You can also apply a little Kerosene or White Spirits to the cloth and work it on to the tar, leaving it to rest for 5 minutes before wiping off.
Lastly, you can dab paste onto the tar spots, spread it around, and let it sit for a few minutes before removing.
How do you remove tar from a car without damaging paint Australia?
To remove tar from a car without damaging the paint in Australia, spray or pour WD-40 or Goo Gone onto a clean microfiber cloth and rub it into the tar.
Alternatively, apply a small amount of WD-40 to a clean cloth and gently wipe away the tar spots.
Finally, use soapy water to clean the area, put kerosene or white spirit on a cloth and work it onto the tar for up to five minutes before using a cloth to easily remove it.
Will paint thinner remove tar from car?
Yes, paint thinner can be used to remove tar from a car.
Other types of petroleum distillates like kerosene, diesel, mineral spirits, turps, and xylene can also be used.
What is the best product for removing bugs from car?
For removing bugs from cars, the GYEON Quartz Q2M Tar Remover is the best product choice. It is a powerful, effective and long-lasting bug and tar remover that works on all vehicle surfaces.

Comments